Plumbing Leak Detection: Inspect Damp Walls Before Opening Them

A damp patch has appeared on your wall and is gradually getting bigger. Does that mean the pipe directly behind it is leaking? Not necessarily. Sometimes water travels through plaster or moves downward from a higher location before becoming visible on the painted surface. Opening the wall immediately may therefore cause unnecessary damage in an area far from the actual source of the leak. A better approach is to have a plumbing technician examine the moisture pattern, review the pipe routes, and use appropriate detection methods before deciding where an opening may be necessary. This article explains how hidden water leaks inside walls are investigated, how pipe leakage differs from other moisture problems, and when limited wall opening becomes necessary after diagnosis.
Plumbing Technician for Water Leak Detection in Kuwait

When you request a plumbing technician for water leak detection in Kuwait, the most important thing is to ensure that the inspection begins with understanding the problem rather than immediately recommending that the wall be broken open. A damp patch or peeling paint is not enough to identify the location of a damaged pipe, particularly because water can travel through building materials and become visible some distance from the original leakage point.
The technician needs to know when the moisture first appeared and whether the affected area is continuously expanding or changes according to water usage. They should also ask whether the wall is close to a bathroom, kitchen, or water supply pipes, and whether the problem began after previous maintenance, faucet installation, or modifications to the plumbing system. These details help identify possible pipe routes instead of opening the wall at random.
Another important step is examining both sides of the wall whenever access is possible. For example, if a damp patch appears on a bedroom wall and a bathroom is located on the other side, that relationship deserves investigation. However, it does not conclusively prove that the bathroom is responsible. The cause could be a water supply pipe inside the wall, a waterproofing problem, or another moisture source, depending on the location and behavior of the dampness.
Consider a practical example: a homeowner notices swollen paint near the bottom of a wall and immediately requests demolition at that location. During inspection, the technician discovers that moisture extends from a higher area and collects near the floor. In this situation, reviewing the likely water route and moisture distribution before selecting an opening point is preferable because the largest damp patch may not be closest to the source.
It is also important to distinguish between a technician who identifies possibilities through a structured inspection and someone who makes a final diagnosis based solely on the appearance of a stain. Measurements and tests can help narrow down the search, but some situations require additional investigation or a limited opening to confirm which component is damaged.
Regarding costs, ask about the inspection fee and whether it includes only an initial assessment or additional testing. You should also establish whether pipe repairs and wall restoration are charged separately. Identifying the source of a hidden leak is not the same service as repairing the pipe or restoring the wall finish afterward.
-
If moisture appears on a wall shared by two rooms, both sides should be examined and nearby water usage reviewed rather than assuming that the wetter side identifies the confirmed source of leakage.
-
If the problem began after plumbing modifications, tell the technician what work was performed and where, because recent changes can help prioritize inspection points without automatically proving that the earlier maintenance caused the leak.
-
If the damp patch continues expanding, documenting its size and the timing of changes can provide useful information, although the pattern alone cannot identify the damaged pipe.
-
If the technician recommends opening the wall, ask which inspection findings support the proposed location so that the decision is based on clear evidence rather than guesswork.
-
If you are comparing leak detection services, clarify the scope of the inspection and the separate costs of repair and restoration because the initial inspection price does not necessarily represent the final cost.
Detecting Water Leaks Inside Walls
Detecting water leaks inside walls requires understanding how water moves between pipes and building materials. A wall is not a single solid surface. It consists of different layers, including plaster and finishing materials, and may contain gaps or pathways that allow water to travel before becoming visible on the outside.
If a pressurized water pipe develops a leak, water may continue escaping even when faucets are not being used, depending on the supply conditions and valve positions. However, persistent dampness does not automatically prove that a pressurized pipe is leaking, because other moisture sources can keep a wall wet for an extended period.
One factor that helps diagnosis is identifying the type of pipe running through the wall. Is it a cold-water supply line, a hot-water line, or is the wall close to drainage pipes? The operating conditions differ. Supply pipes experience pressure under certain conditions, while drainage pipes generally carry water during use, although exceptions depend on the system's design.
The technician may benefit from appropriately isolating sections of the plumbing system and monitoring pressure changes when the installation allows such testing. However, a pressure drop alone does not identify the leak's location. Valves, connected equipment, and the testing procedure must all be considered so the result can be interpreted correctly.
For example, dampness appears on a hallway wall next to a bathroom and becomes more noticeable after periods of bathroom use. This observation may lead the technician to inspect drainage lines, waterproofing, and nearby connections rather than concentrating exclusively on a water supply pipe inside the wall. If evidence of water loss continues when fixtures are not being used, the inspection priorities may change.
Sound is not always an available indicator either. Some leaks produce vibrations or noises that suitable equipment can detect, but the sound level is affected by pipe material, water pressure, installation depth, and surrounding noise. The absence of an audible dripping or rushing sound does not mean there is no leak.
The objective is not simply to establish that moisture exists inside the wall. It is to connect the visible signs with plumbing inspection results so the most likely area can be identified before deciding whether to open the wall.
-
If dampness appears near cold- or hot-water pipes, the pipe route and operating conditions should be established because the presence of plumbing behind a wall does not prove that one of the pipes is leaking.
-
If moisture increases after bathroom or kitchen use, the technician may need to compare usage times with the wall's condition and inspect drainage and waterproofing rather than focusing solely on supply lines.
-
If a pressure test is performed on a pipe section, the result must be interpreted according to the isolation method, measurement procedure, and connected components because a changing reading can have more than one explanation.
-
If no leak-related sound can be heard, hidden leakage should not be ruled out because sound transmission varies with pipe type, installation depth, and surrounding conditions.
-
If testing identifies a suspected area, its location should be checked against the pipe route and moisture indicators before selecting an opening point to avoid unnecessarily removing a larger section of the wall.
Inspecting Wall Moisture Before Breaking Open the Wall

Inspecting wall moisture before breaking open the wall is important because the appearance of a damp patch does not reveal whether water is coming from a pipe, condensation, moisture penetrating through finishing materials, or another nearby source. Rushing to remove tiles or plaster can expose an undamaged section while the original problem continues.
The first requirement is understanding how moisture is distributed. Is the dampness concentrated in one small spot, extending vertically, or appearing along the bottom of the wall? These patterns help describe the problem and determine where measurements should be taken, but they are not definitive indicators of a particular leak type. Water movement is affected by construction materials and internal gaps.
Some moisture meters provide readings that help compare different sections of a wall. Their value lies in making comparisons rather than relying entirely on visual observation. However, a high reading does not necessarily mean that the pipe behind that location is damaged. Material composition, salts, and metal elements inside the wall can affect certain types of instruments, so the readings must be interpreted alongside other observations.
It is also important to establish whether the affected wall is external or internal. An external wall may be exposed to rainwater, finishing joints, or other moisture sources. An internal wall close to plumbing requires an assessment suited to its location. The same explanation should not automatically be applied to every damp patch in a property.
Suppose paint begins peeling on an internal wall, but there is no clear evidence of water loss from the plumbing system. Instead of immediately opening the wall, it may be appropriate to measure moisture, review the surrounding conditions, and establish whether there are genuine indicators of pipe leakage. If the findings remain inconclusive, the technician should explain which additional tests are necessary.
It is also important to understand that a non-destructive inspection cannot always establish the final cause. In some cases, testing can narrow down the suspected area considerably before any opening is made. However, confirming the condition of a concealed connection or repairing it may still require removing a limited section of the wall finish.
Ideally, the decision to open the wall should be supported by several consistent findings, including moisture location, pipe routes, and relevant test results, rather than a single device reading or the appearance of a paint stain.
-
If the damp patch covers a large area, do not automatically select its wettest point for demolition because water may have traveled through the plaster from a source some distance away.
-
If the technician uses a moisture meter, readings should be compared with suitable reference areas and interpreted according to the wall material rather than treating a high number as definitive proof of a broken pipe.
-
If dampness appears on an external wall, possible sources of water entering from outside should be reviewed before concluding that internal plumbing is responsible.
-
If the inspection results are unclear, ask for an explanation of the possible causes and additional steps instead of approving the removal of a large wall section without a reasonably identified suspected area.
-
If opening the wall becomes necessary, the required access area, protection of surrounding finishes, and repair and restoration arrangements should be discussed beforehand so the work is clearly defined.
Locating a Hidden Water Leak
Locating a hidden water leak involves more than searching for a damp patch on the wall because visible moisture may be far from the point where water escapes from the pipe. In some situations, water moves through gaps around plumbing installations or between layers of plaster before appearing at a weaker point in the finish. Identifying the leak location therefore requires connecting inspection findings with pipe routes and the nature of the problem.
An important consideration is whether the leak involves a main supply pipe or a branch line. A main pipe may supply several fixtures, while a branch serves a particular faucet or appliance, depending on the plumbing layout. Understanding this division helps the technician narrow down the investigation, especially when shutoff valves allow individual sections to be tested separately.
Suppose a damp patch appears on a hallway wall near the kitchen, but no pipes are visible. Before considering demolition, the technician should review the likely pipe routes and establish whether kitchen supply lines pass through that wall or follow another route. The kitchen's proximity does not necessarily mean it is the source of the leak.
The inspection may also involve comparing the system's condition before and after isolating a particular line, provided the installation allows appropriate testing. However, changes in wall moisture are not always immediate because building materials can retain water for some time after leakage stops. The continued presence of dampness immediately after closing a valve therefore does not prove that the suspected line is still leaking.
One mistake is asking the technician to open the wall at the location of a single sound or measurement without verifying its relationship to the pipe route. A better approach is to identify a likely inspection area and then select an appropriate access point if the evidence is sufficient.
Locating the suspected area with reasonable accuracy does not necessarily reveal the pipe's internal condition. The fault may involve a fitting, a crack, or a deteriorated section, and confirming the type of damage may require physical access to the plumbing.
-
If moisture appears far from water fixtures, likely supply routes should be reviewed because concealed pipes may pass through a wall even when no faucet or visible plumbing connection is nearby.
-
If the plumbing network has valves that allow individual sections to be isolated, appropriately testing each section may help narrow down the leak location instead of opening several areas of the property.
-
If the wall remains damp after closing a suspected supply line, this should not automatically be treated as proof that leakage continues because building materials can retain water after the source has stopped.
-
If the inspection identifies a likely area, discuss the evidence supporting that location and the degree of confidence in the findings before agreeing to remove wall finishes.
-
Once the pipe is exposed, the damaged section and nearby fittings should be examined before repairs because the opened area may reveal several possible faults requiring verification.
Non-Destructive Water Leak Detection Technician
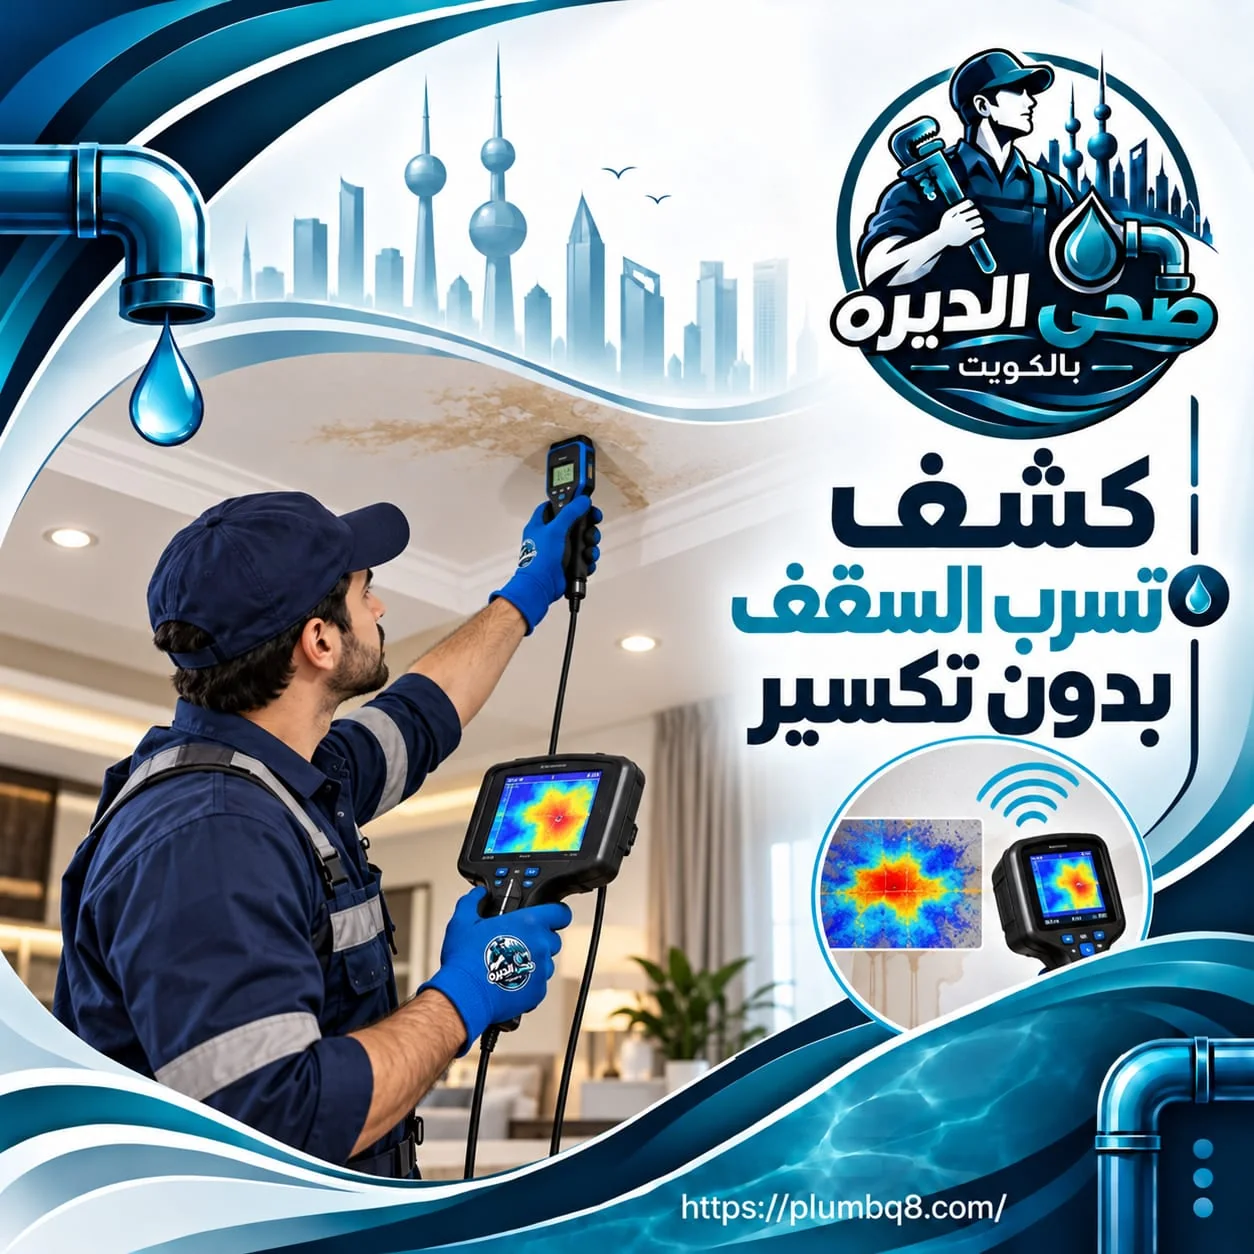
When looking for a non-destructive water leak detection technician, it is important to distinguish between identifying leak indicators without damaging finishes and actually repairing the leak. Some inspections can be carried out without removing tiles or plaster. However, if a damaged pipe is confirmed inside a wall, a limited opening may still be necessary to reach and repair it.
The purpose of non-destructive detection is to reduce unnecessary demolition, not to guarantee that the wall will never need to be opened. The technician selects an inspection method according to the type and location of the plumbing, access to isolation valves, and building conditions. Some cases require findings from more than one method before the suspected area can be identified.
The technician should also explain the limitations of the method being used. For example, a moisture meter helps compare wall areas but cannot independently establish whether the problem comes from a pipe or another source. Acoustic listening devices may be useful under certain conditions, but their effectiveness varies with the type of leak and surrounding noise.
Consider a homeowner with expensive bathroom tiles who is worried about having them broken. The better approach is not to search for someone promising absolutely no demolition, but to choose a technician who explains how the suspected area will be narrowed down before any opening is considered. If testing indicates a relatively small area, it may be possible to select a limited access opening rather than remove a large section without justification.
Regarding prices, non-destructive detection costs may vary according to the inspection area, number of pipe sections requiring testing, equipment involved, and procedures needed. Some cases also require another visit or specialized testing. It is therefore important to understand what the quoted price includes before approving the work.
Avoid confusing the absence of demolition with the absence of damage. If water continues leaking inside a wall, delaying repairs solely to avoid opening the finish may allow moisture to spread into additional areas.
-
If a technician advertises leak detection without demolition, ask whether the service identifies a suspected area or confirms the actual fault because repairing a concealed pipe may still require limited access.
-
If the wall has expensive tiles or decorative finishes, discuss how the access point will be selected so unnecessary removal can be minimized wherever practical and safe.
-
If the equipment produces inconclusive findings, the technician should explain what additional testing is required rather than guaranteeing that the leak is located at a particular point.
-
If you are comparing detection quotations, check whether inspection, testing, repairs, and restoration are included because these services may be charged separately.
-
If dampness continues increasing without visible dripping, do not delay the investigation simply because avoiding demolition seems more important than addressing the water source.
Water Leak Detection Equipment
Using water leak detection equipment helps the technician gather information about the problem, but no single device is suitable for every leak or building condition. Some instruments measure moisture indicators, others detect sounds or vibrations associated with water movement, and some display surface temperature differences.
Acoustic listening devices work by detecting signals that may be produced when water escapes under pressure. Their effectiveness depends on factors such as network pressure, pipe material, installation depth, wall construction, and surrounding noise. If the leak is small or operating conditions do not produce a clear signal, the results may be limited.
Moisture meters, on the other hand, help compare different surface areas. Their advantage is that they can reveal moisture distribution more clearly than visual inspection alone. However, they do not automatically identify where the water originated. Some building materials, metallic elements, and salts can also influence readings, depending on the instrument.
A thermal imaging camera, when available and appropriate for the situation, displays differences in surface temperatures. It does not directly show water inside the wall. Therefore, an area appearing in a different color is not conclusive evidence of a leaking pipe, because temperature variations can have other causes.
Suppose a moisture meter shows a high reading near a wall corner, while acoustic testing produces no clear signal. These results are not necessarily contradictory because each instrument measures something different. The technician needs to interpret them alongside the pipe location and surrounding conditions before deciding what to do next.
It is also important not to choose a service simply because it advertises sophisticated equipment. What matters is why a particular device is being used, whether it is suitable for the suspected leak, and what useful information it provides.
Equipment does not eliminate the need for professional judgment. Measurements must be understood in the context of the plumbing system; otherwise, a normal moisture indicator or sound from a nearby pipe could be incorrectly interpreted as the leak location.
-
If the technician uses acoustic equipment, establish whether the pressure conditions and pipe type are suitable for detecting a useful signal because the absence of a clear sound does not necessarily rule out leakage.
-
If a moisture meter shows a high reading, it should be interpreted according to the wall material and surrounding areas rather than treated as a direct identification of a broken pipe.
-
If a thermal imaging camera is used, remember that it displays surface temperature differences rather than water itself, so the image must be interpreted in relation to the conditions of the property.
-
If different detection methods produce inconsistent results, review what each device measures and what information it provides instead of automatically selecting the highest reading or clearest image.
-
If a technician recommends an additional device-based inspection at an extra cost, ask what benefit it is expected to provide and whether its findings will meaningfully help determine where the wall should be opened.
Wall Dampness Caused by Leaking Pipes
Wall dampness caused by leaking pipes may begin with subtle signs such as discoloration, swollen paint, or a dark patch. Over time, the finish may peel, or salt deposits may appear on the surface. However, these signs alone do not prove that a pipe is broken. Moisture can also result from condensation, external water penetration, or waterproofing problems, depending on the wall's location.
The important distinction is that a plumbing leak involves water escaping from part of the plumbing network, while other moisture sources may have no direct connection to pressurized supply lines. The technician must therefore review the surrounding conditions before selecting a repair method.
If the wall is near a bathroom, possible causes may include supply pipes, drainage lines, or waterproofing around wet areas. If it is an external wall and dampness appears after rainfall, water entering from outside should be investigated rather than automatically assuming that a concealed pipe is responsible.
For example, a damp patch appears at the bottom of a bedroom wall next to a bathroom and becomes more noticeable after showering. The inspection may need to include the shower area, drain connections, and waterproofing rather than focusing only on the cold-water supply pipe. The relationship between moisture and usage helps guide the investigation but does not establish the final cause.
In another situation, paint begins peeling on a wall far from the bathroom and continues deteriorating even when water fixtures are not being used. The technician may need to assess the supply network and other moisture sources according to the building conditions instead of deciding to break open the wall based solely on the stain's position.
Covering dampness with fresh paint before addressing its source is another mistake. Even if the visible signs disappear temporarily, swelling and peeling may return if water continues reaching the wall.
After a leak has been repaired, the wall will not necessarily dry immediately. Drying time varies with the amount of water absorbed, construction materials, and ventilation. The wall's condition should therefore be evaluated before final decorative finishes are applied.
-
If dampness increases after the shower is used, possible leakage involving supply lines, drainage, and waterproofing should be investigated rather than assuming that one particular pipe inside the wall is responsible.
-
If a damp patch appears on an external wall after rainfall, sources of water entering from outside should be examined before agreeing to open internal plumbing installations.
-
If paint is peeling or plaster is swelling, do not begin redecorating before addressing the moisture source because replacing the surface finish alone will not prevent the problem from returning.
-
If the leak has been repaired but the wall remains damp, allow for drying time according to the building's condition rather than immediately interpreting remaining moisture as proof that the repair failed.
-
If signs of dampness appear in several rooms, the inspection should establish whether they are connected to one source or represent separate problems before a repair plan is prepared.
Identifying the Source of Moisture Inside a Wall
Identifying the source of moisture inside a wall is different from simply confirming that the wall is damp. The objective is to understand how water reached that location. It may originate from a pipe within the wall, flow downward from a higher installation, or migrate from an adjacent area. The investigation therefore needs to consider the direction of moisture movement and its relationship to the room layout and plumbing routes.
The position of the damp patch relative to the ceiling, floor, and corners can help guide the inspection. For example, moisture appearing near the ceiling makes it reasonable to investigate possible sources above the affected area. However, not every high-level damp patch indicates a leak from the floor above. Similarly, dampness at the bottom of a wall does not prove that the water originated there.
In a multistory building, the technician may need to establish the positions of bathrooms, kitchens, and plumbing installations on the floor above or in adjoining rooms, where access is possible. Water can travel through different pathways before appearing in the damaged area.
Consider a damp patch near the top of a living room wall, with a bathroom directly above it on the second floor. The bathroom's location makes it reasonable to investigate its pipes and waterproofing, but it does not establish the source. The technician may need to compare the timing of the dampness with bathroom use and perform appropriate tests before deciding whether the ceiling or wall should be opened.
Another important detail is that some walls contain electrical installations close to plumbing routes. Selecting an opening point therefore involves more than identifying the suspected leak. The technician must consider surrounding safety risks and avoid damaging other concealed services.
It is also important to distinguish between treating visible dampness and repairing its source. Drying the wall or removing damaged plaster may form part of the restoration process, but neither replaces the need to correct whatever allows water to enter.
-
If moisture appears near the ceiling, pipes and areas above the affected wall should be reviewed instead of assuming that the water source is located at the visible stain.
-
If the wall is adjacent to a bathroom on another floor, the technician may need to compare water usage times with inspection findings to establish whether the two locations are actually connected.
-
If dampness extends along a wall corner, the path of water movement through the building layers should be investigated because the visible pattern may show where water collects rather than where it first escapes.
-
If concealed electrical installations may be present near the proposed opening, their risks and routes must be assessed before demolition begins.
-
If the wall is dried before the underlying cause is repaired, the visible signs may disappear temporarily but moisture can return, so correcting the water source must remain an essential part of the work.
Inspecting Pipes Inside Walls Before Opening Them

Inspecting pipes inside walls before opening them helps select an appropriate access point instead of removing a large area of finishing material without a clear plan. However, the inspection should not begin with the wall alone. It requires understanding the plumbing network passing through it, the type of pipes installed, and the locations of shutoff valves and connected fixtures.
It is important to know whether the plumbing is old or has been modified over the years. Some properties have pipe routes that differ from their original plans because of previous renovations. The technician should not rely solely on assumptions about where a pipe is likely to run without checking the actual installation.
Inspection methods also vary according to pipe material and type. Certain acoustic detection techniques may be more suitable under particular conditions than others, while wall construction and pipe depth affect how accurately the route can be identified. Choosing a method therefore requires technical understanding of the system.
Suppose the technician identifies a suspected area behind bathroom tiles. Before opening it, the possibility of reaching the pipe from the opposite side of the wall or through an existing access panel should be considered, provided the alternative is suitable, safe, and does not cause greater damage. The closest point to the suspected leak is not always the best place to carry out the repair.
You should also discuss how surrounding areas will be protected before finishes are removed. Demolition can affect undamaged materials if the work area is not defined and nearby concealed services are not considered.
It is equally important to agree on what happens if the wall is opened and the expected fault is not found. Testing reduces uncertainty but cannot eliminate it entirely. There should be a plan to review the findings rather than expanding the opening randomly.
After the pipe becomes accessible, the technician must establish the nature of the damage and examine the surrounding section before choosing a repair method. Repairing a defective fitting differs from addressing a cracked pipe or deterioration extending along a longer section.
-
If the property's plumbing is old or has undergone modifications, tell the technician about previous work because the actual pipe routes may differ from expectations and affect where access should be created.
-
If the wall is tiled, consider whether the pipe can be reached from another side with less damage when that approach is suitable and safe instead of immediately removing expensive finishes.
-
If testing identifies a suspected area, nearby electrical wiring and other concealed services must be considered before demolition so that repairing a water leak does not cause additional damage.
-
If the fault is not found after the selected area is opened, the inspection findings and pipe route should be reassessed rather than continuing to enlarge the opening without a plan.
-
Once the damaged pipe section is exposed, the technician should inspect the extent of deterioration and nearby fittings before repairing it so that an adjacent damaged area is not overlooked.
Pinpointing a Water Leak With Detection Equipment
Pinpointing a water leak with detection equipment is useful when measurements are incorporated into a clear inspection plan rather than relying on one reading as definitive proof. Detection instruments provide information about moisture, sound, or surface temperature differences, while identifying the actual cause requires connecting those findings with pipe routes and operating conditions.
In some situations, testing can narrow the suspected leak location to a specific section of wall. However, accuracy varies according to the type of leak, pipe depth, construction materials, and the ability to isolate plumbing lines. It is therefore inappropriate to promise that every leak can be located within a centimeter or with absolutely no uncertainty.
The results should also be understandable to the homeowner. For example, if measurements show increased moisture near a known supply route, the technician should explain what additional evidence supports selecting that area for opening. If the results suggest several possibilities, those uncertainties should be explained rather than presenting an unsupported final diagnosis.
Suppose dampness appears on a bathroom wall, and an acoustic signal is detected in one area while the highest moisture readings are found below it. This difference may be reasonable if water travels through the wall before becoming visible, but it still requires interpretation against the pipe route. The objective is not to choose the location with the highest reading automatically, but to identify the most likely point based on all available evidence.
Regarding costs, equipment-based leak detection prices may vary according to the tests required, accessibility, and the size of the inspection area. Opening the wall, repairing the pipe, and restoring the finish are also different stages of work, and their costs should be clarified before the process begins.
With Sehi Al Deira, you can request an inspection of concealed water leakage inside a wall and discuss the damp area and appropriate detection options before deciding whether demolition is necessary. What matters when selecting the service is a clear explanation of the diagnostic steps and the limitations of the findings. A well-planned inspection can help reduce unnecessary wall opening without making unrealistic guarantees.
-
If the technician uses several devices, ask what each instrument measures and how its findings relate to the pipe location rather than assuming that using more equipment automatically guarantees an accurate diagnosis.
-
If acoustic measurements and moisture readings indicate different areas, the differences should be interpreted and the likely water route reviewed before selecting an opening point.
-
If someone claims that the leak has been pinpointed with absolute precision, ask about the limitations of the inspection because accuracy depends on leak conditions and wall materials.
-
If you are comparing detection prices, clarify which tests are included and whether opening the wall, repairing the pipe, and restoring the finish are covered or charged separately.
-
If the inspection identifies a likely location, agree on the access and repair plan and how the technician will confirm that leakage has stopped before the wall is closed again.
Conclusion
When dampness appears on a wall, it does not automatically mean that the pipe directly behind the visible stain is leaking. Water can move through plaster, travel downward from a higher location, or originate from something unrelated to pressurized supply pipes. That is why a plumbing technician for water leak detection in Kuwait should begin by inspecting the moisture pattern, reviewing pipe routes, and using appropriate detection methods before recommending demolition.
With Sehi Al Deira, you can request an inspection of hidden water leakage inside a wall and discuss the necessary testing and repair steps according to the condition of the plumbing. The objective is to ensure that any wall opening is supported by clear findings and limited to an appropriate working area, while confirming that the water source has been repaired before the finishing materials are restored.
Frequently Asked Questions About Detecting Water Leaks Inside Walls
How can I tell if wall dampness comes from a leaking pipe?
A damp patch or peeling paint alone is not enough. The technician needs to review pipe routes, examine when the moisture appears, and carry out appropriate tests to distinguish plumbing leakage from other moisture sources.
Can water leaks be detected without breaking the wall?
In some situations, non-destructive inspection methods can narrow down the suspected leak location before the wall is opened. However, repairing a concealed pipe or confirming the condition of a particular fitting may still require a limited opening.
Can a leak detection device locate the exact point of leakage?
Accuracy depends on the instrument, type of leak, pipe depth, and wall materials. Detection equipment provides information that helps identify the suspected area, but absolute precision cannot be guaranteed in every situation.
Why does dampness appear far from the damaged pipe?
Water can travel through plaster layers or gaps around concealed plumbing before reaching the surface. The visible damp patch may therefore be some distance from the original point where water escapes.
Does a high moisture meter reading mean a pipe is broken?
No. A high reading indicates moisture-related conditions according to the instrument, but it does not independently prove that a pipe is broken. The result must be interpreted alongside other tests and the wall's condition.
Do I have to break bathroom tiles to repair a hidden leak?
Not necessarily at the beginning. The suspected area and possible access options should be investigated first. If reaching the damaged pipe requires an opening, an appropriate location can be selected after inspection rather than removing tiles randomly.
Could wall dampness come from waterproofing rather than plumbing?
Yes. Some moisture problems are associated with waterproofing defects, water entering from outside, drainage problems, or condensation. The source must be identified before deciding on the repair method.
How much does water leak detection cost in Kuwait?
The price depends on the inspection area, required tests, and accessibility. Leak detection, pipe repairs, wall opening, and restoration may also be separate services, so it is best to clarify the costs before agreeing to the work.
Will the wall dry immediately after the leak is repaired?
Not necessarily. Building materials can retain moisture for some time after the water source has been stopped. Drying time depends on the amount of moisture, wall construction, and ventilation, so the wall should be assessed before redecorating.
When should I call a plumbing technician for leak detection?
If you notice an expanding damp patch, recurring paint damage, or moisture that returns after drying, a professional inspection is appropriate. If water is near electrical installations or there is an obvious continuous leak, the immediate priority is to make the area safe and shut off the water supply when it can be done safely.